Struggling with dingy, crumbling grout lines in your shower is a frustrating rite of passage for many homeowners. You spend hours scrubbing, yet the moisture-prone bathroom environment seems to win the battle against mold and mildew every time. While selecting the perfect ceramic or stone tile is often the primary focus of a remodel, the grout you choose ultimately dictates the structural longevity of the entire installation.
Making the right material selection grants you a beautiful, leak-free shower and a lifetime of low-maintenance surfaces. However, an important educational stipulation exists: each option demands a vastly different installation skill set. For instance, while epoxy offers unmatched chemical resistance and commercial-grade waterproofing, traditional cement grout provides a highly forgiving, classic application process that is far easier for novice DIYers to handle.
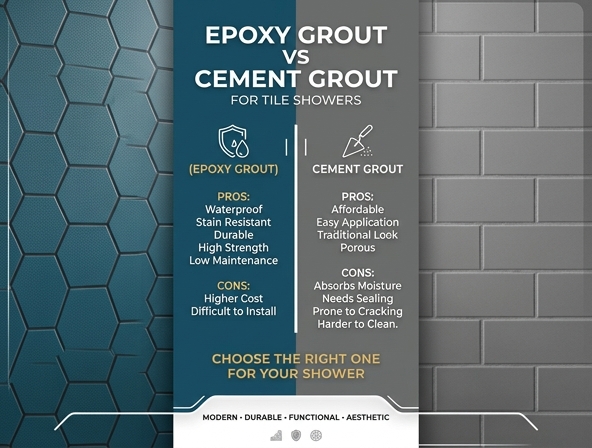
To ensure your project's success, this guide will break down the essential differences in durability, cost, and application complexity, helping you confidently select the ideal grout for your tile shower.
Introduction: Why Grout Choice Matters for Shower Tiles
When planning a shower remodel, it is easy to get swept up in selecting the perfect ceramic, porcelain, or natural stone tiles. However, the performance and longevity of your shower depend heavily on a component that is often treated as an afterthought: the grout. Grout does not just fill the gaps between your tiles; it holds the assembly together, seals out moisture, and protects your wall cavities from structural water damage.
For DIYers, choosing the right grout is a pivotal decision. The two primary contenders for shower installations are traditional cement grout and modern epoxy grout. Each material features distinct chemical properties, application methods, and long-term maintenance requirements.
In this comparative guide, you will learn the practical differences between these two options. We will break down their water resistance, installation complexity, aesthetic durability, and overall costs so you can execute a waterproof, beautiful, and long-lasting shower installation with confidence.
Understanding Cement Grout: The Traditional Standard
What is Cement Grout?
Cement-based grout has been the industry standard for tiling projects for decades. It is primarily composed of Portland cement, filler particles, pigments, and water-retentive additives. When mixed with water or a liquid latex additive, it forms a workable paste that easily fills the joints between tiles.
Sanded vs. Unsanded Cement Grout
Cement grout comes in two primary variations, and choosing the right one depends on the width of your tile joints:
- Sanded Grout: This formulation contains fine sand particles that prevent the grout from shrinking as it cures. It is the ideal choice for joint widths of 1/8 inch or wider. The sand acts as a structural reinforcing agent.
- Unsanded Grout: This smooth mixture lacks sand particles and is designed for narrow joints smaller than 1/8 inch. It is commonly used on delicate surfaces like polished natural stone or glass tiles to avoid scratching them during application.
Why Cement Remains Popular
Cement grout remains highly popular for residential tile installations because of its familiarity, excellent workability, and forgiving nature during cleanup. It allows DIYers a generous working window to adjust mistakes, and it represents a highly cost-effective solution for standard home tiling projects.
Demystifying Epoxy Grout: The Modern Waterproof Powerhouse
Unlike traditional mixtures, epoxy grout contains absolutely no cement. Instead, it is made of epoxy resins and a hardening agent, combined with silica sand and pigments. This formulation initiates a chemical reaction upon mixing, creating a material that is virtually indestructible once cured.
The defining characteristic of epoxy grout is its completely non-porous structure. Because it does not absorb water, it is naturally waterproof and impervious to liquids, making it incredibly well-suited for high-moisture environments. In a shower, where walls and floors are subjected to daily deluge, this moisture barrier acts as an outstanding line of defense against subfloor rot and water migration.
This chemical configuration also means that epoxy grout does not require any post-installation sealing, providing a permanent shield against daily wear, soap scum, and water-related degradation.
Durability and Water Resistance: A Direct Comparison
In a wet shower environment, the performance gap between cement and epoxy grouts becomes highly apparent. Showers demand materials that can handle constant exposure to water, harsh bath products, and abrasive cleaning chemicals.
| Performance Metric | Cement Grout | Epoxy Grout |
|---|---|---|
| Water Absorption | High (Porous, requires regular sealing) | Virtually Zero (100% waterproof) |
| Stain Resistance | Low (Easily absorbs oils and dirty water) | Excellent (Impervious to stains) |
| Chemical Resistance | Moderate (Can be eroded by acidic cleaners) | Outstanding (Resistant to harsh chemicals) |
| Mold & Mildew Resistance | Low (Porous surface harbors fungal growth) | High (Inhibits microbial growth) |
While cement grout can perform adequately when properly sealed, epoxy grout provides a worry-free surface that stands up to the harshest shower conditions without degrading or supporting mold growth.
DIY Application: Installation Complexity and Working Time
The Working Window and Cleanup
When evaluating these materials for a DIY project, the physical application process is often the deciding factor. The physical properties of these two materials dictate vastly different installation experiences.
- Cement Grout Application: Mixing and applying cement grout is a straightforward, forgiving process. You have a generous working window (often 30 to 45 minutes) to spread the mixture before it starts to set. Excess material is easily wiped away with a damp tiling sponge and clean water, and minor mistakes can be corrected as you go.
- Epoxy Grout Application: Epoxy is notoriously challenging to apply. Once the resin and hardener are combined, a rapid chemical reaction begins, leaving you with a very limited working time (often less than 20 minutes). It is thick, sticky, and requires significant physical effort to pack into joints.
- The Cleanup Phase: Cleaning epoxy residue from tile faces requires specialized sponges, precise water-to-cleaner ratios, and swift action. If epoxy residue cures on the tile surface, it creates a permanent, glossy haze that can only be removed with aggressive chemical strippers or physical scraping.
For beginners, cement grout is significantly more user-friendly, whereas epoxy demands speed, precision, and preparation.
Aesthetics, Color Consistency, and Fading Over Time
Over years of daily shower use, grout color can degrade. Traditional cement grout is highly prone to pigment washout and fading. Hard water deposits, minerals, and acidic bath products can slowly leech the color out of cement joints, resulting in splotchy, uneven tones. Additionally, because cement is porous, deeply embedded soap scum can permanently discolor white or light-colored grouts, forcing you to use aggressive scrubbing or colorants to restore them.
Epoxy grout is incredibly colorfast because its pigment is locked inside the cured plastic resin. It will not fade from scrubbings or chemical contact. However, DIYers must note that epoxy is susceptible to UV yellowing. If your shower receives direct, intense sunlight from a skylight or window, lighter shades of epoxy grout may slowly take on an amber or yellow tint over several years. For indoor showers with standard lighting, epoxy retains its original, vibrant color flawlessly.
Cost Analysis: Upfront Price vs. Long-Term Value
A thorough budget calculation must weigh the immediate out-of-pocket costs of your materials against the future investments of time and maintenance. Here is how the financial breakdown shapes up for a standard-sized shower:
- Upfront Material Costs: Cement grout is highly affordable, typically costing a fraction of the price of epoxy. A bag of high-quality cement grout usually costs under twenty dollars, whereas a single unit of epoxy grout can easily exceed eighty to one hundred dollars.
- Required Tooling: Cement applications require basic, inexpensive tools like a standard rubber float and utility sponges. Epoxy requires specialized hard-rubber floats, epoxy-specific scrub pads, and cleaning concentrates, which add to the initial project cost.
- Long-Term Maintenance: Cement grout must be sealed upon installation and resealed every one to two years. Over time, the cost of sealers, specialty mold removers, and the inevitable labor of scraping and regrouting worn areas accumulates.
- The Value of Epoxy: Epoxy grout requires no sealing, zero repairs, and drastically reduces cleaning expenses. It represents a higher upfront investment but delivers exceptional long-term financial value by outlasting the tile itself.
The Selection Matrix: How to Choose for Your Specific Shower
To help you navigate this decision for your unique DIY tiling project, use this simple checklist matrix to identify which material aligns with your goals and shower configuration:
- Choose Cement Grout if: You are working with a tight budget, you are a beginner DIYer who wants a forgiving installation process, you are installing highly sensitive natural stone like polished marble, or you are tiling a low-use guest shower.
- Choose Epoxy Grout if: You are tiling a high-traffic family shower, you want to eliminate the chore of scrubbing mold and sealing grout joints, you are using glass or ceramic tiles, and you have enough DIY confidence to work quickly.
Pro Tips for DIY Shower Grouting Success
Working with Cement Grout
- Do not overwater the mix: Adding too much water during mixing weakens the cement structure and leads to pinholes, cracking, and severe color shading.
- Apply high-quality sealer: Wait at least 72 hours after grouting to apply a premium penetrating sealer. This is your only line of defense against mold and moisture absorption.
Working with Epoxy Grout
- Manage the temperature: Warm environments accelerate epoxy's curing speed. Keep your workspace and materials cool (around 70 degrees Fahrenheit) to maximize your working time.
- Mix in small batches: If you are working alone, do not mix the entire bucket of epoxy at once. Divide the components precisely and mix smaller portions to prevent the grout from hardening before you can apply it.
- Use the double-bucket cleaning system: Keep one bucket of clean water for your initial wipe and a second bucket of clean water with neutralizer for your final pass to prevent haze from setting on the tile.
Final Verdict: Which Grout Wins for Your DIY Shower?
Choosing between cement and epoxy grout comes down to balancing your current DIY skill level and budget against your desire for a maintenance-free shower. Cement grout remains an excellent, forgiving choice for budget-conscious DIYers who do not mind occasional sealing and regular cleaning. It provides a classic, uniform finish with minimal installation stress.
On the other hand, epoxy grout stands out as the ultimate option for durability and absolute waterproofing. If you can handle the fast-paced installation process and the higher upfront cost, epoxy will reward you with a lifetime of stain-proof, mold-free tile joints that never require sealing.
Assess your project timeline, measure your confidence, and choose the material that will give you a beautiful, leak-free, and high-performing shower for decades to come.

Leave a comment